Dungeon Alchemist
Using the Asset Importer
Bring your own Blender-built props, scatter and tiles into Dungeon Alchemist using the built-in Asset Importer.
Step-by-step
- 1
Prepare your asset in Blender
Model at real-world scale (1 Blender unit = 1 meter), apply transforms (Ctrl + A → All Transforms), and pack textures into the .blend or export them alongside the model. - 2
Export as FBX, GLB or STL
File → Export → glTF 2.0 (.glb) is preferred — it bundles geometry, materials and textures into a single file. FBX also works if you need legacy compatibility, and STL is supported for geometry-only assets. - 3
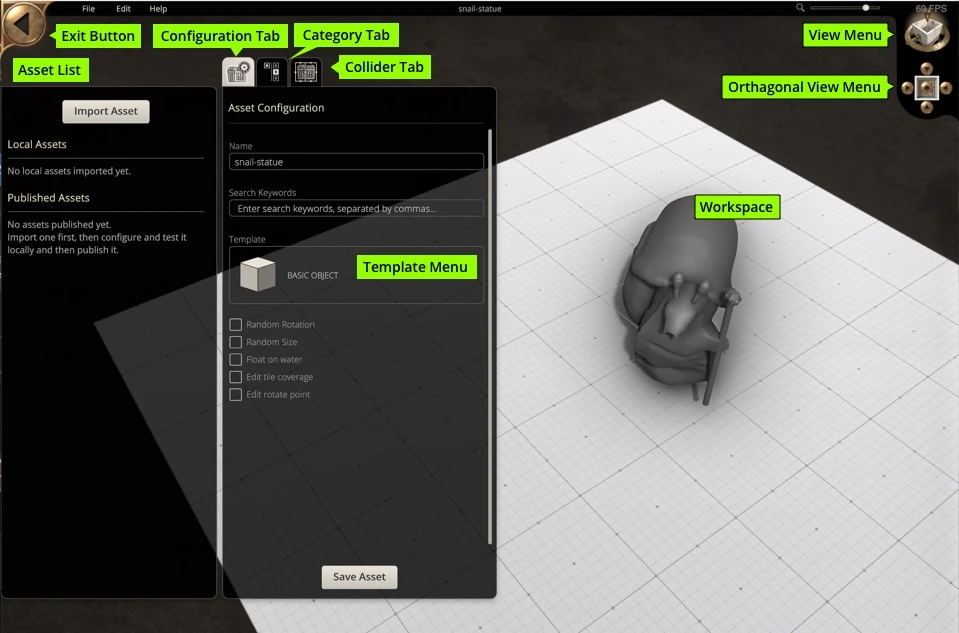
Open the Asset Importer
In Dungeon Alchemist, open the menu and choose 'Asset Importer' to launch the standalone import tool. - 4
Import your file
Drag your .glb or .fbx into the importer window. Set the asset category (prop, tile, scatter) and adjust scale or pivot if needed. - 5
Tag and save the asset
Add tags so it shows up in the right Dungeon Alchemist search results, set a thumbnail, then save to your custom asset library. - 6
Use it in a map
Back in Dungeon Alchemist, your custom asset appears in the asset browser under your chosen category — drag it onto the map like any built-in prop.
Pro tips
- Keep poly counts reasonable (25 meg or less) — Dungeon Alchemist renders many assets at once, so optimize before export.
- Bake complex shaders to texture in Blender; the importer supports standard PBR maps best.
- Use a consistent origin point (usually base center) so assets snap predictably to the grid.
- Dungeon Alchemist Wiki has a more thorough explanation which can be found here.